
Caps are one of the most recognizable products decorated with embroidery. A small logo, company name, sports emblem, or custom design can turn an ordinary cap into a professional-looking branded item. 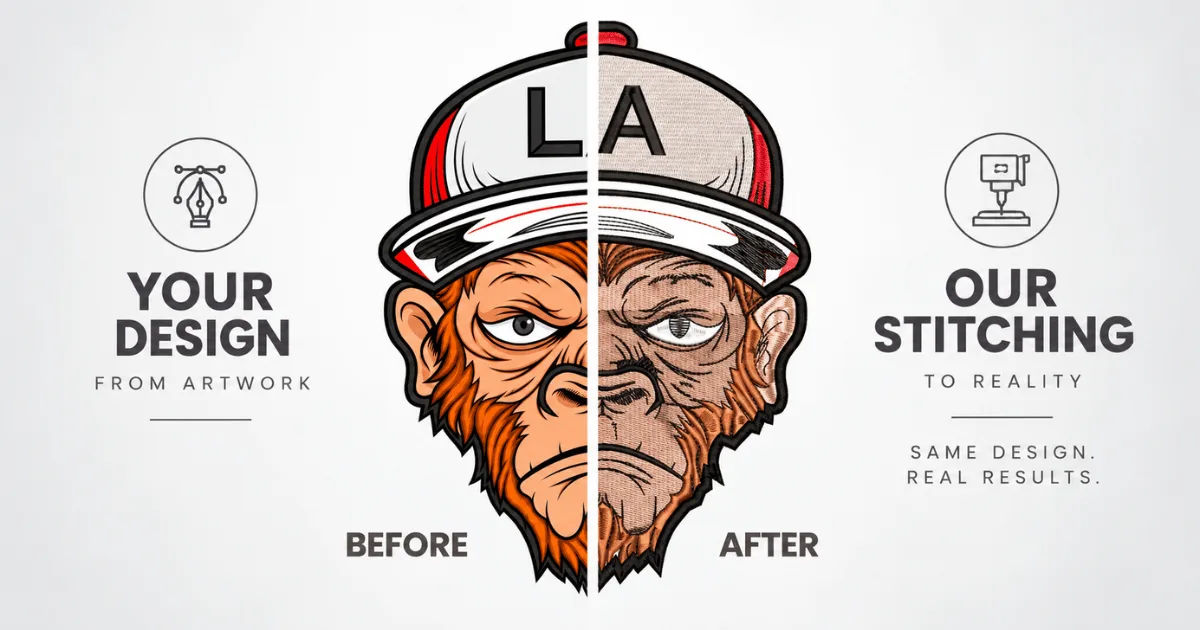
The curved shape, limited decorating area, seams, panels, and structured materials of caps create unique challenges. The design has to be prepared specifically for the shape and construction of the cap. This is where Embroidery Digitizing becomes especially important.
Unlike ordinary artwork files, an embroidery design must contain instructions that an embroidery machine can understand. It needs information about stitch types, stitch direction, density, thread changes, underlay, sequencing, and other technical details. For caps, these instructions must also account for the way the fabric curves around the wearer's head.
A design that looks perfect on a computer screen can produce poor results when stitched onto a cap if it has not been prepared correctly. Letters may become distorted, outlines can shift, and details may disappear.
Professional Embroidery Digitizing solves these problems by converting artwork into a stitch-ready design that is suitable for the specific cap and embroidery machine.
What Makes Cap Embroidery Different?
The Curved Surface
The biggest difference between cap embroidery and flat embroidery is the curved surface.
A cap is not completely flat. When the front panel is attached to the crown, it creates a rounded surface. The embroidery machine must stitch across this changing surface while maintaining the intended appearance of the design.
If a design is created without considering this curvature, the finished embroidery may look stretched or compressed in certain areas.
Experienced digitizers compensate for this by adjusting stitch placement and design structure before the machine begins stitching.
The Center Seam
Many caps have a seam running vertically down the center of the front panel. This seam can interfere with embroidery, especially when a design crosses directly over it.
The digitizer may need to modify the artwork or adjust the stitch sequence so the machine can move across the seam more effectively.
A strong design plan can reduce puckering, uneven stitches, and alignment problems around the center area.
Limited Embroidery Space
Caps usually offer less embroidery space than jackets, shirts, bags, or other larger garments.
This means every part of the design matters. Extremely small lettering, complicated details, and thin outlines may not stitch successfully at cap size.
Embroidery Digitizing helps determine which elements should remain, which need to be enlarged, and which should be simplified.
How Embroidery Digitizing Prepares a Design for a Cap
The process starts with artwork. This might be a company logo, sports symbol, monogram, illustration, or custom graphic.
The artwork itself does not normally contain the information required by an embroidery machine. It must be converted into a specialized embroidery format.
During Embroidery Digitizing, the artwork is broken into sections that can be represented with different stitch types and stitch directions.
The digitizer decides how the machine should build the design from the fabric upward. This involves much more than simply tracing the original image.
Choosing the Right Stitch Types
Different parts of a design require different stitch structures.
Satin stitches are commonly used for borders, lettering, narrow shapes, and smooth lines. Fill stitches are useful for larger areas. Running stitches can be used for fine outlines or details.
For caps, stitch selection is particularly important because excessive stitching can create unnecessary weight and tension.
A skilled digitizer chooses stitch types according to the size and shape of each design element.
Setting Stitch Density
Stitch density refers to how closely stitches are placed together.
Too much density can make the embroidered area heavy and stiff. It may also cause thread buildup, puckering, or problems during stitching.
Too little density can leave gaps in the design and allow the cap material to show through.
Embroidery Digitizing involves finding the appropriate balance for the cap material, thread, design size, and stitch type.
Planning Stitch Direction
Stitch direction can dramatically influence how embroidery looks.
Changing the direction of stitches can create visual contrast and help different sections of a logo stand apart. It can also improve how the embroidery handles the curved surface.
For example, a digitizer might change stitch angles between neighboring sections rather than filling everything in one direction.
This creates a cleaner result and can help manage fabric movement during stitching.
The Importance of Underlay for Caps
Underlay is a foundation layer placed beneath the visible stitches.
It helps stabilize the fabric and provides support for the top layer of embroidery. On caps, this foundation can be especially useful because the material is being stitched on a curved and sometimes firm surface.
The type of underlay depends on the fabric, design, and stitch structure.
A poorly chosen underlay can create problems. Too much may make the embroidery unnecessarily thick, while too little may allow the design to shift or lose its shape.
Good Embroidery Digitizing accounts for underlay before the visible stitches are added.
How Lettering Is Digitized for Caps
Lettering is one of the most common forms of cap embroidery. Businesses frequently place their names on caps, while sports teams, clubs, schools, and individuals use embroidered text for identification and style.
However, small lettering presents a major technical challenge.
A font that looks readable on a computer may become unclear when reduced to the size required for a cap.
Choosing Suitable Fonts
Bold and relatively simple fonts generally work better for small cap lettering.
Very thin strokes can disappear when stitched. Decorative fonts can also become difficult to read if the letters are too small.
The digitizer may need to modify the lettering rather than simply use the original font.
Spacing between letters can also be adjusted to improve readability.
Maintaining Letter Shape
Curved surfaces can make lettering appear different from how it looks on a flat screen.
The digitizer may compensate for this by changing stitch direction, spacing, pull compensation, and sequencing.
This is one reason professional Embroidery Digitizing is more than converting an image into stitches. The digitizer is preparing the artwork for a physical manufacturing process.
Pull Compensation and Cap Embroidery
When embroidery stitches are placed into fabric, they can pull the material toward the center of the stitched area.
This effect is known as pull compensation.
Without appropriate compensation, letters and shapes may become narrower than intended. Gaps can also appear between adjoining elements.
A digitizer anticipates this movement and slightly adjusts certain areas of the design.
Cap embroidery can be particularly sensitive to these effects because the fabric is structured and curved.
Proper Embroidery Digitizing helps preserve the intended dimensions of the artwork after stitching.
Sequencing Matters on Caps
The order in which sections are stitched can affect the final appearance.
If the machine stitches one area too early or too late, later stitches may distort it. Poor sequencing can also create unnecessary jumps, thread changes, or movement across the cap.
A good digitized design uses an efficient sequence that supports both appearance and production speed.
For example, the digitizer may organize sections so that nearby elements are completed together before moving to another area.
This reduces unnecessary machine movement and can improve consistency across multiple caps.
How Cap Structure Influences Digitizing
Not every cap is made the same way.
Some caps have structured front panels that hold their shape. Others are softer and more flexible. There are also trucker caps with mesh sections, unstructured caps, performance caps, and specialty materials.
Each construction can respond differently to embroidery.
Structured Caps
Structured caps generally provide a firm embroidery surface. However, their stiffness can make it important to manage the stitch load carefully.
A design with excessive density may become too rigid or produce unwanted distortion.
Unstructured Caps
Unstructured caps are softer and may move more during stitching.
Stabilization becomes particularly important in these cases. The digitized design must work with the fabric rather than relying on the material to remain completely rigid.
Mesh and Lightweight Materials
Lightweight materials require additional care.
Large, dense designs can overpower the fabric. The digitizer may simplify the artwork or reduce stitch density where appropriate.
This demonstrates why Embroidery Digitizing should always consider the actual product rather than treating every cap as identical.
Why Designs Are Tested Before Production
Even a carefully digitized design should ideally be tested before a large production run.
A sample stitch-out reveals problems that may not be obvious on the computer.
The test can show whether lettering is readable, whether the design is properly centered, whether the stitches are too dense, and whether the cap material is reacting appropriately.
Checking the Finished Sample
After stitching, the sample should be examined from normal viewing distance.
Some small imperfections that are visible close up may not matter in everyday use. Other problems, such as distorted lettering or poor alignment, can be obvious even from several feet away.
The digitizer can make adjustments based on the test result.
This process is one of the most valuable stages of Embroidery Digitizing because it connects digital preparation with real-world production.
Common Cap Digitizing Mistakes
Several mistakes repeatedly cause problems in cap embroidery.
Using a Standard Flat Design
A design created for a shirt or flat garment may not automatically work on a cap.
The curvature and seams need to be considered.
Making Details Too Small
Tiny details can disappear completely after stitching.
Simplification is often necessary when artwork is reduced for a cap.
Using Excessive Stitch Density
Too many stitches can create a heavy, stiff design and increase the risk of puckering.
The goal should be controlled coverage rather than simply adding more stitches.
Ignoring the Center Seam
A design positioned directly over a cap seam may experience alignment and stitching difficulties.
The digitizer should plan around the construction of the cap.
Choosing the Wrong Thread Sequence
Poor sequencing can increase thread changes and unnecessary movement while also affecting the appearance of overlapping sections.
Careful planning produces a cleaner and more efficient embroidery process.
How Embroidery Digitizing Improves Cap Branding
Caps are often used as mobile branding tools. Employees wear them at events, sports teams use them for uniforms, and businesses give them away as promotional products.
Because the front of a cap is highly visible, poor embroidery can make an otherwise professional brand look cheap.
Clean lettering, balanced spacing, sharp outlines, and consistent thread coverage create a stronger impression.
Embroidery Digitizing allows the same logo to be prepared specifically for cap production, helping businesses maintain a consistent visual identity across their promotional products.
Choosing a Professional Digitizer for Cap Designs
When selecting a digitizing service, do not judge quality only by the appearance of a sample image.
Ask whether the digitizer understands different cap constructions, embroidery machines, thread behavior, stabilization, and small lettering.
It is also useful to ask whether they provide test revisions when a design does not stitch correctly.
A professional digitizer should understand that embroidery is a physical process. The objective is not merely to create an attractive digital file. The objective is to create a file that produces reliable stitches on the actual product.
Good Embroidery Digitizing therefore combines design knowledge with practical machine experience.
How the Process Works From Artwork to Finished Cap
The complete workflow can be understood as a series of practical stages.
First, the original artwork is reviewed. The digitizer examines its size, colors, lettering, outlines, and small details.
Next, the design is planned according to the dimensions available on the cap.
The artwork is then converted into stitch objects. Stitch types, density, direction, underlay, sequencing, and compensation are assigned.
Afterward, the design is saved in the appropriate machine format.
A sample cap is then stitched whenever possible.
The finished sample is inspected for alignment, readability, density, thread coverage, and distortion.
If necessary, the design is edited and tested again.
Once the result is satisfactory, the file can be used for production.
This workflow demonstrates the practical role of Embroidery Digitizing in transforming an ordinary graphic into a functional embroidery design.
Tips for Getting Better Cap Embroidery Results
Start with high-quality artwork whenever possible. Clean artwork gives the digitizer a better foundation.
Tell the digitizer the exact cap type, material, intended embroidery size, and embroidery machine information if available.
Do not insist on preserving every tiny detail from a large logo. Some details simply cannot survive at small embroidery sizes.
Choose thread colors that provide enough contrast against the cap.
Always consider how the design will look from normal viewing distance rather than judging it only while holding the cap close to your face.
Finally, request a test stitch-out for important or large orders. A small amount of testing can prevent significant production waste.
Conclusion
Cap embroidery looks simple from the outside, but producing a clean and professional result requires careful technical preparation. The curved surface, center seam, limited decorating area, fabric type, and structured construction all influence how a design should be stitched.
This is why Embroidery Digitizing plays such an important role in cap decoration. It transforms artwork into detailed machine instructions while accounting for stitch type, density, direction, underlay, sequencing, pull compensation, and the physical characteristics of the cap.
The best results come from treating the cap as a specific embroidery product rather than simply shrinking a design created for another garment.
Professional digitizing also helps solve common problems such as distorted lettering, excessive thread buildup, poor coverage, puckering, and disappearing details. Testing the design on an actual cap provides another layer of quality control and allows adjustments before full production begins.
Whether the cap is being made for a company, sports team, school, event, clothing brand, or personal project, proper preparation can make a major difference. A well-digitized design looks sharper, stitches more consistently, and represents the original artwork more accurately.
Ultimately, successful cap embroidery depends on the relationship between artwork, digitizing, materials, machine settings, and production technique. When these elements are planned together, even relatively small cap designs can achieve impressive clarity and durability.