
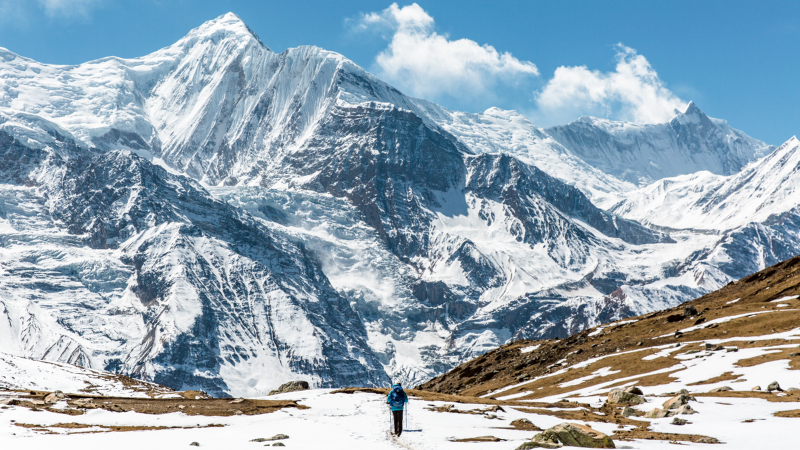
The Trek to Annapurna Base Camp is a nature paradise and dreamland for both photographers and adventurers. With soaring peaks, moody weather, and varied terrain, the ABC trek is ripe for photography—if you know how to do it. Taking breathtaking photos here is not purely a matter of a nice camera, but timing, attention, and creativity.
One of the first lessons toward awesome trail photography is how it’s all about the light– and the timing. The Himalayan mountain range is at its best during the golden hours—early morning and late afternoon. These times provide a soft light that accentuates the textures and colors of peaks like Machapuchare (Fishtail) and Annapurna I. Wake up early or hike in the late afternoon if you want to capture that magic hour glow on the snow-capped giants.
Don’t just fire away from the obvious ones. What you should be looking for instead are layers — foreground elements such as prayer flags, trekkers, trees, or stone steps provide depth to your images. Play with angles and perspective, get down on your knees, shoot wide, and don’t hesitate to explore the vertical. These methods of perspective should help capture the drama and grandeur of the mountains.
Keep an eye on the weather, which changes often in the Annapurna region. Whether it’s clouds washing over the peaks, snow suddenly blowing sideways, or mist in the forests, they can all turn an ordinary shot into a beautiful one. Carry your camera in the ready position and covered by a weather-resistant bag or zip lock if needed. When the sky’s cloudy, gain moody, contrast-rich portraits or village scenes.
Culture and people are as potent as landscapes. The Annapurna region encompasses Gurung and Magar villages lined with vibrant homes, prayer wheels, and smiling locals. Respectfully documenting intimate moments of daily life, tea houses, and fellow trekkers. These human touches will establish emotional connections in your storytelling.
Using a smartphone? Don’t worry — today’s phones are capable of remarkable quality. Enable HDR mode for high-contrast scenes, and tap to lock your exposure/focus if you’re capturing a sunrise or sunset. Apps like Lightroom Mobile are available for download for some on-the-go post processing. Bring a featherweight tripod for the low-light and sunrise shots if you’re using a DSLR or mirrorless camera.
Also, don’t forget your power source: Out in the boondocks, there are few places to charge up. Bring additional batteries or a solar charger. Memory cards or on-board storage fill up quickly, so take along backups, or upload to cloud storage if you can find a connection in lower villages like Chhomrong or Ghandruk.
Above all, be present. Some of your most beautiful photo moments will happen when you’re in the moment, rather than hunting for the perfect image. Allow the progression of challenges to unfold, and your photos will tell your ABC story like no other.
Whether you are an amateur or professional photographer, taking amazing pictures on the Annapurna Base Camp trek is about combining adventure with artistic vision. With some planning, attention, and imagination, your lens can capture the wonders of the Himalayas for a lifetime.
When Are The Good Times Of The Day To Take Photographs To Base the Annapurna Camp Trek?
The two best times to take beautiful photos on the Annapurna Base Camp (ABC) trek are known as the golden hours – early morning just after sunrise and late afternoon before sunset. These are times of soft, warm light that accentuates the textures of the tangled Himalayan terrain and amplifies natural shades of snow, sky, and forage.
Morning light is particularly fascinating on Annapurna Base Camp, as the sun rises behind Machapuchare and Annapurna I, leaving dramatic shadows and intense glows on the peaks. To capture these moments, you need to wake up early. There is also backlighting in the late afternoon, with beautiful soft light in colors in villages like Chhomrong, Bambo, and Ghandruk.
Stay out of the blazing midday sun when you can. It mutes contrast or blow-out areas, particularly on snow or light-coloured rock. If you have to shoot at this time, get creative with the shadows involved, or turn to black-and-white and concentrate instead on textures and composition.
Just remember, light changes quickly in the mountains — clouds roll in and out, and weather can turn fast. Always have your camera handy. With or without a smartphone or a DSLR, a well-timed shot can transform an ordinary moment into an extraordinary image.
Where on the ABC Trail Will I Get the Most Photogenic Shots?
The ABC Trek is full of stunning spots that are immensely photogenic, but some of them take the cake for the must-visit locations. Most famous of all, of course, is Annapurna Base Camp itself (4,130m). Here, the surrounding peaks—Annapurna I, Hiunchuli, Machapuchare (Fishtail), and Annapurna South—tower almost 360 degrees around you, and here the scene should excel for sunrise photography.
Another stunning place is Machapuchare Base Camp (3,700m), which is frequently under mist or snow, making your photos look mystical. Chhomrong is a magnificent place to see Machhapuchhare in the distance, looming large over the terraced fields. The rhododendron-filled forests near Bamboo and Dovan set an atmospheric scene that looks great in a photo, particularly in spring when the flowers are in bloom.
Ghandruk, Nestled in a traditional Gurung village, Ghandruk — stone buildings, prayer flags, and mountains in the backdrop — has cultural richness. It is great for people-and-place photographs. Bridges across fast rivers, trails precariously etched into cliff edges, and waterfalls near Jhinu Danda can also yield striking compositions.
Bring a wide-angle lens for landscapes, and a telephoto lens for photos of distant peaks or wildlife. And even on a smartphone, some guidance on where to point it goes a long way. These iconic spots are just the beginning of your photographic story.
How Do You Photograph Local Culture Without Being Disrespectful?
Shooting the culture and people of the Annapurna region will infuse depth into your visual narrative, but please do so responsibly and ethically. Nepalese are famous for their hospitality, especially the Gurung and Magar people on the ABC trail. But that doesn’t mean every second is a photo op.
Always ask before taking someone’s picture up close, especially an elder or a child. A warm smile and a modest request — “Photo, okay?” —is often enough. And most everyone will cheerfully say yes, and a few will even kneel. If they say no, take that no with all seriousness and move on.
Concentrate on candid moments: a woman at the loom, a porter making tea, monks at prayer. The three images tell a more dynamic story than a posed portrait, and are less likely to be noticed if you click the camera quietly from a distance.
When in monasteries or temples, be aware that some are saying no to images during ceremonies. Also, refrain from peeking inside people’s homes unless you’re explicitly invited.
Annapurna Base Camp Hike Show the photos if possible. Some trekkers deliver instant photos as gifts with their cool little gadget printers, which the locals love. Photography should contribute to the appreciation of culture, not be an intrusion. With respectful patience, you will come away with more than great pictures — you’ll have some depth to your interaction.
What Camera Gear to Carry on the ABC Trek?
The best photography clothing for the Annapurna Base Camp trek varies depending on how you shoot, how much weight you are willing to carry, and how much power you have. No matter if you are a pro or just a casual shooter, the trick is to pack lightly but intelligently.
For those with a DSLR or mirrorless system, a weather-sealed camera body and wide-to-mid zoom lens (such as a 24–70mm) completes the kit for nearly all situations. Add a light telephoto for shooting distant peaks or wildlife. If you’re not packing light and can carry extra weight, a tripod works well for sunrise or sunset — and just about any night shot.
Phones have gotten smarter, and phone apps and clip-on lenses have gotten more powerful. For difficult lighting, try out the HDR mode and opt for some manual focus/exposure for increased control.
Could’ve used some more accessories such as:
Extra batteries (3-4) – cold will eat your power in a hurry
Memory cards – carry backups
Microfibre cloths – for wiping away dust or snow
Power bank or solar charger – for charging over several days
All-weather camera backpack – protects cameras from rain & dust
Weight adds up fast. Opt for versatility and ruggedness over the bulk of gear. You aim to be able to move, but be prepared to shoot some stunning moments from base camp to the village trail.
How Do You Weatherize Your Camera Gear for High Altitude?
Annapurna Weather is quite fickle. One hour it is sunny, the next it is snowing or raining. Add to that cold air and altitude, and your camera gear must be seriously protected to keep working.
Annapurna Base Camp Trekking The first would be to use weather-sealed equipment when you can. If your camera or phone isn’t weatherproof, store it in a dry bag or waterproof pouch when not in use. Even slipping it into a spotless, airtight ziplock bag in your daypack does a fine job for light protection.
Altitude alone doesn’t harm electronics, but condensation that results from the fluctuating temperatures does. To avoid this, don’t come inside and remove your cold camera from your bag in a warm room brusquely — let it adjust to the warmth slowly. If the fog builds up on your lens or viewfinder, rub it off gently with a microfiber cloth, not tissue.
Cold will zap the battery life quickly. Keep batteries in your jacket or sleeping bag at night to keep them warm. Never leave your gear outside at night unless it’s somewhere secure and dry.
Also, don’t change lenses in wind, dust, and snow. Keep it simple and closed. There is a lot to be said for a little caution in the Himalayas.
The better you take care of that gear, the more likely you’ll be ready to shoot the next photo-worthy moment that arises — sunrise over Annapurna South or prayer flags in the mist.
How to Compose Your Trek Photos for Maximum Impact
Annapurna Trek Be sure to master composition to turn simple snapshots into powerful images on the Annapurna Base Camp trek. Skills like the Rule of Thirds assist in balancing your frame by aligning a key element —mountains, prayer flags, hikers — with imaginary gridlines, or intersections, in order to make them more appealing.
Guiding lines, be it a looping trail, river, or even fence, bring the observer further into the landscape and provide a sense of scale and a journey. Framing your subject with natural or native elements — overhanging branches, arches of rock, the windows of tea houses — gives an image depth and context.
Be sure to also play with negative space: a wide expanse of sky or snow fields can highlight the scale of the Himalayas, isolating your subject for drama. New angles, like shooting from the ground up or above, frame new shots that often have unique stories to tell.
It is easy to be drawn to the majestic peaks, but using the likes of colorful rhododendrons, prayer flags, or perhaps the local architecture to make a three-dimensional scene will be rewardingly noticeable as well. Keep your photo story dynamic by shooting wide landscapes and close-ups in between.
Armed with an awareness of composition principles, you’ll arrest not just the essence, but also the central spirit of your Annapurna voyage in every frame — each shot becomes a visual journey in itself, and their collective sum is a breathtaking spectacle.
What Are the Best Camera and Smartphone Settings for Photographing on the Trek?
ABC Trekking By the time you reach the Annapurna Base Camp, the light and the contrast have changed quite dramatically; when you’re taking a picture, you may find that the object is too bright because it’s reflecting the light. For digital SLRs and mirrorless cameras, begin with aperture priority mode ( often called A or Av) to adjust the amount of desired depth of field and select the aperture to f/8 or f/11 for even sharper landscapes.
Set your ISO to as low as possible (typically 100-200) to reduce noise, but turn it up for llow-lightor or indoor shots. Shoot with a fast shutter speed (1/250s or faster) to freeze motion on windy days or while photographing moving trekkers or prayer flags.
Manually focus in fog or low contrast, where autofocus is likely to hunt. Bring a polarizing filter for your camera to cut down on glare from the snow and bring out blue skies.
If you’re shooting with your smartphone, try switching to HDR mode to keep bright skies from exceeding the range of shadowed foregrounds. Focus and exposure lock by tapping on your subject, especially during sunrise and sunset. Align horizons with built-in grids and manually control apps if possible.
Also, don’t forget to capture photos in the RAW format in cameras, which will give flexibility in post processing, very much needed, especially when shooting high contrast scenes where many details are not underexposed or overexposed, found commonly in the Himalayas.
With good settings, your gear will pick up tricky conditions well, and it will keep every breathtaking detail.
How Do You Handle Battery Life and Storage in Multi-Day Treks?
Annapurna Sanctuary Trek Power outlets are limited and charging is slow or expensive , so it is important to manage your battery life and storage on the Annapurna Base Camp trek. Cold temperatures also deplete batteries more quickly than usual.
To avoid draining your battery, keep spares warm inside your jacket or sleeping bag, swap batteries before they run out, and conserve battery life by turning the phone off when not in use. Switch off the Wi-Fi, Bluetooth, and GPS when they are not in use. Put your device in airplane mode when you have a long wait. If you’re running on battery and the screen is dim, try brightening it to save some battery.
Bring a power bank with a high mAh rating, or a solar charger if you plan to refill away from the grid on sunny days. Charging Charges of a few dollars are common in many teahouses in larger villages, just bring your charger and adapters.
When it comes to storage, instead of a single card, just take a bunch of high-capacity cards. Back up pictures frequently to a portable hard drive or upload them to the cloud when Wi-Fi is available, especially in towns like Pokhara.
Every day, delete so-so and duplicate shots to make space. Get your photos organized in folders and folders in a library.
Thanks to smart battery and storage management, you’ll never miss a moment because one of your gadgets is dead and/or your cards are full, so that all the best moments of your journey are preserved!
Can You Shoot Under Stars & Astrophotos on the ABC Trek?
Yes! The trek to ABC has some of the most visionable clear skies offering perfect conditions for night sky and astro photography. From high up in the mountains, away from city lights, you can get awesome shots of stars, the Milky Way, and even the occasional meteor shower.
Everest Base Camp Trek To photograph the night sky, you will need a sturdy tripod, a camera that is capable of set time on the shutter speed, and a wide-angle lens with a large aperture (at least around f/2.8 or lower). Manually fire the camera in mode and set your ISO between 1600-3200 while fooling around with shutter speeds ranging from 15-30 seconds.
Plan to shoot on clear nights — stay on top of weather forecasts — and avoid nights when the moon is bright if you want to see stars best. Apps such as Star Walk or Photopills make it easier to locate the Milky Way and plan composition with prominent foreground peaks or prayer flags.
Some smartphones admit long exposure by a special app, but the actual result varies from one to another. Do not have shaky hands!!! Use a steady surface or tripod to prevent blur!
Don’t forget to dress warm during long exposures and bring extra batteries, because the cold will suck the life out from your batteries. With patience and planning, shooting ABC under the stars uncovers a magical aspect of the Himalayas that few can experience.
So, how can post-processing help your Trek photos?
Post-processing will be the last step that will take your Annapurna Base Camp images from good to breathtaking. Editing software such as Adobe Lightroom and Photoshop, or apps on your phone, like Snapseed, give you the option to bolster color, sharpen details, and recompose the image after the trek.
Begin by playing with exposure and contrast to draw in the details lost in the shadows or highlights. Gently enhance vibrancy and saturation to make skies and landscapes jump without appearing unnatural.
Use the clarity slider to add texture to rocks, trees, and mountain ridges. Trim the images to adjust framing or eliminate the noise factor.
Fix lens distortion or tilt the horizon simply by straightening your landscapes. Shooting RAW gives you full control of white balance, so snow looks normal, not blue-ish (I’m looking at you, iPhone) or yellow-ish.
Nothing about it reads local; it’s a rare middle ground of cinemas and boulevards. Don’t hold it, don’t do anything to chase away that actual-during-read nature of most journeys. And finally, an editing style will also allow a consistent visual story to be told along your travels.
Post-processing gives your photos that extra punch to share with friends, family, and your social media circle of choice.
How Deadly is the Annapurna Base Camp Trek?
ABC is known as one of the safer high-altitude treks in Nepal; however, there are risks involved, and so we highly recommend you be properly prepared for the trek, and that way, no one’s ambitions or expectations (or insanity) are going to hinder another person’s trekking experience. It’s difficult to pin down hard numbers on the death rate, but fatal incidents are still far less common than on other, more technical treks — say, to a summit at Annapurna or Everest.
The majority of deaths witnessed on ABC result from Acute Mountain Sickness (AMS), falls while attempting steep trails , and unexpected weather changes. Correct acclimatization, pacing, and the use of experienced guides all minimize risk enormously.
The Nepal Tourism Board and trekking agencies keep safety foremost with permits and regulations. With proper acclimatization and respect for the altitude, the Annapurna Base Camp trek is a challenging but safe journey for the majority of trekkers.
What to Bring to Annapurna Base Camp?
Everest Base Camp clothing. The right clothes are crucial to keep you comfortable and safe. These hues make otherworldly sense when dressing for a mountain whose temperatures fluctuate from subtropical at the base to alpine at the 4,130-meter summit.
Base Layer: Hygroscopic thermal underwear to remove your sweat from your skin.
Insulation: Fleece or down jacket for cold mornings and evenings.
Shell: A waterproof and windproof jacket and pants to keep out rain and snow.
Trekking Shirts and Pants: Lightweight materials that dry you out on those day hikes.
Accessories: Warm hat, gloves, neck gaiter or buff, and good hiking socks.
Footwear: Well broken-in waterproof trekking boots with good ankle support.
Extras: Sunglasses (with UV protection) and a sun hat for the lower altitudes.
Layering helps you adapt to quickly changing weather and activity levels so you stay dry and comfortable on any adventure.
Which One Is More Difficult, Everest Base Camp or Annapurna Base Camp?
You will get to experience an amazing Himalayan trek in both, but they will vary in their level of difficulty. In general, the EBC trek is rougher, with higher altitude (EBC is 5,364 meters compared to ABC’s 4,130 meters), longer trek duration, and more extreme conditions.
The need for more acclimatization days is also higher at EBC, and there’s more challenging terrain and a greater likelihood of getting altitude sickness along the trail. Annapurna Base Camp is easier, shorter, and shorter, so it is appropriate for medium trekkers.
That said, the fitness and preparation required for both treks are high. The “tougher trek” varies for each person, depending on fitness. Order, please let me know your preferred routes, scenery , and culture.
Which Is The Best Trekking Company for Annapurna Base Camp?
Which is the Best Trekking company for ABC? The best trekking company for Annapurna Base Camp would depend on your budget, service expectations, and trip members. Some trusted companies you can rely on for professionalism, safety, and local assistance are:
Look for company reviews and inquire about guide experience, insurance, and support services. Booking through a licensed agency ensures your permits are obtained legally and your trek goes off without a hitch.